 1976
1976Dipl. Ing. A. Kutschelis & Sohn
Technische Lehrmittel Construktion
D- 59425 Unna
Germany
web: http://www.telc.de
mail: mail@telc.de
phone.: +49 (0) 2303 239999
facs: +49 (0) 2303 239990
| Tool dynamometer milling FKM 2000 | ||
| ||
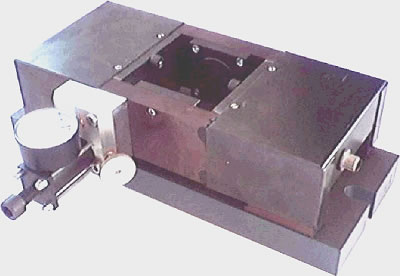
| This six component dynamometer measures the cutting forces in any milling process. It is an improved version based on a principle existing since 1982. The measured values can be read on a large external display using auto-hold. The PC-based data acquisition is performed over the built-in USB interface with our included software for tool dynamometers. With this great properties the device suits for multiple educational and industrial applications. | ||
Downloads: | ||
Measuring range: 3-axes measurement: Fx, Fy, Fz = +/- 3000 N | ||
Experiments: The milling processes's cutting forces are measured on the workpiece. The workpiece is clamped in the dynamometer like in a vice. The device itself is bolted onto the machine's table. The workpiece can be processed with all kinds of milling and grinding (!) tools. The device is protected against liquids. The following experiments are possible:
| ||
Dimensions:
|
||
Keywords: Tool Dynamometer, Cutting tool
dynamometer, Cutting dynamometer, cutting thrust meter, wear detection,
break detection, tool monitoring, Milling, Millerr, Power, Force, Feed,
Cut, Cutting, Burr, Temperature, Torque, Reduction of wear and tear, wear
out |
||
| ©TeLC Unna 2004 | ||
